Making things with your own hands, reducing how much you need to spend, and flowers of all kinds are all integral facets of the cottagecore lifestyle. Whether you are birthday shopping on a shoestring budget, need the perfect idea for your next side hustle, a gift for Mother's Day, or know someone who just moved and could use a little housewarming, these vibrant flowers are the perfect solution. They cost dimes apiece to make*, all the materials needed can be found at the dollar store, and they take 20 minutes to put together with no skills, tricks, or experience required! And for how little trouble they give you, you'll still get all the satisfaction of giving someone a personalized, handcrafted gift that will light up their home.
Without any further ado, let's get started!
*For a full price breakdown, see the end of this article
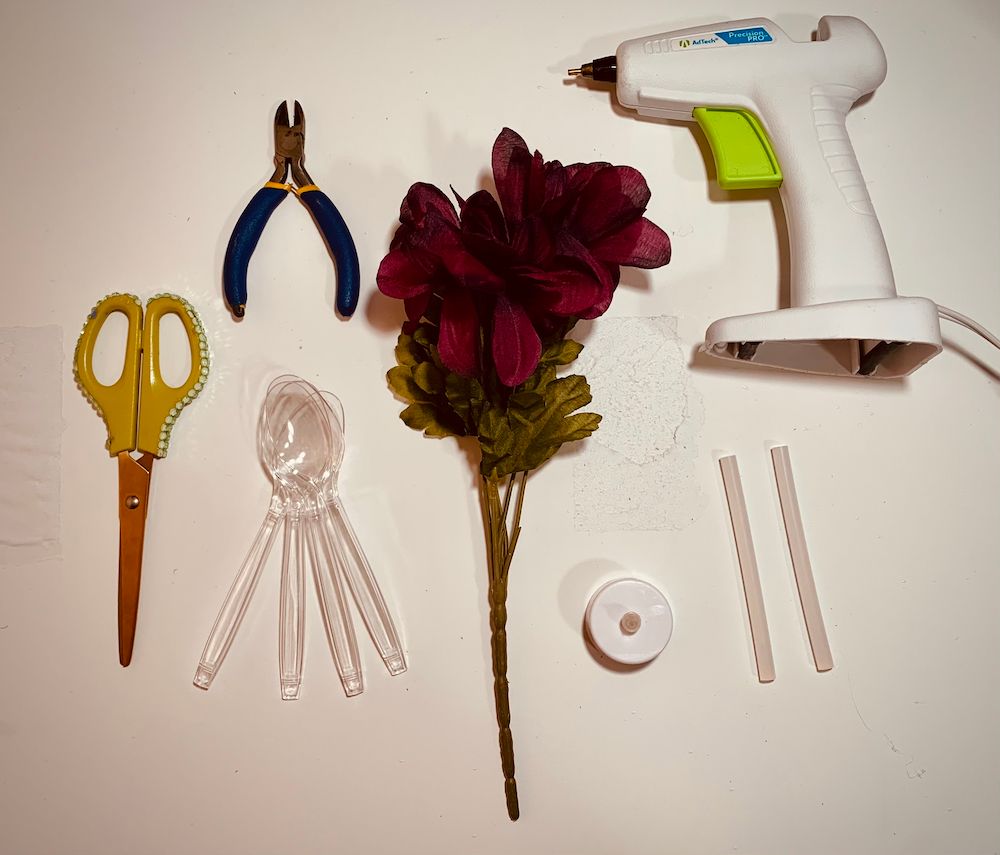
You Will Need:
- A hot glue gun
- Glue sticks
- Wire cutters or other strong cutting implement
- Scissors
- Electric votive candles
- Fake flowers (larger, broader petals are easiest to use and most suited to this shape)
- Clear plastic spoons
- A clean, non-textured and non-fabric surface to work on
- A bowl of cold water (if you are prone to burns when using hot glue)
Making The Flowers:
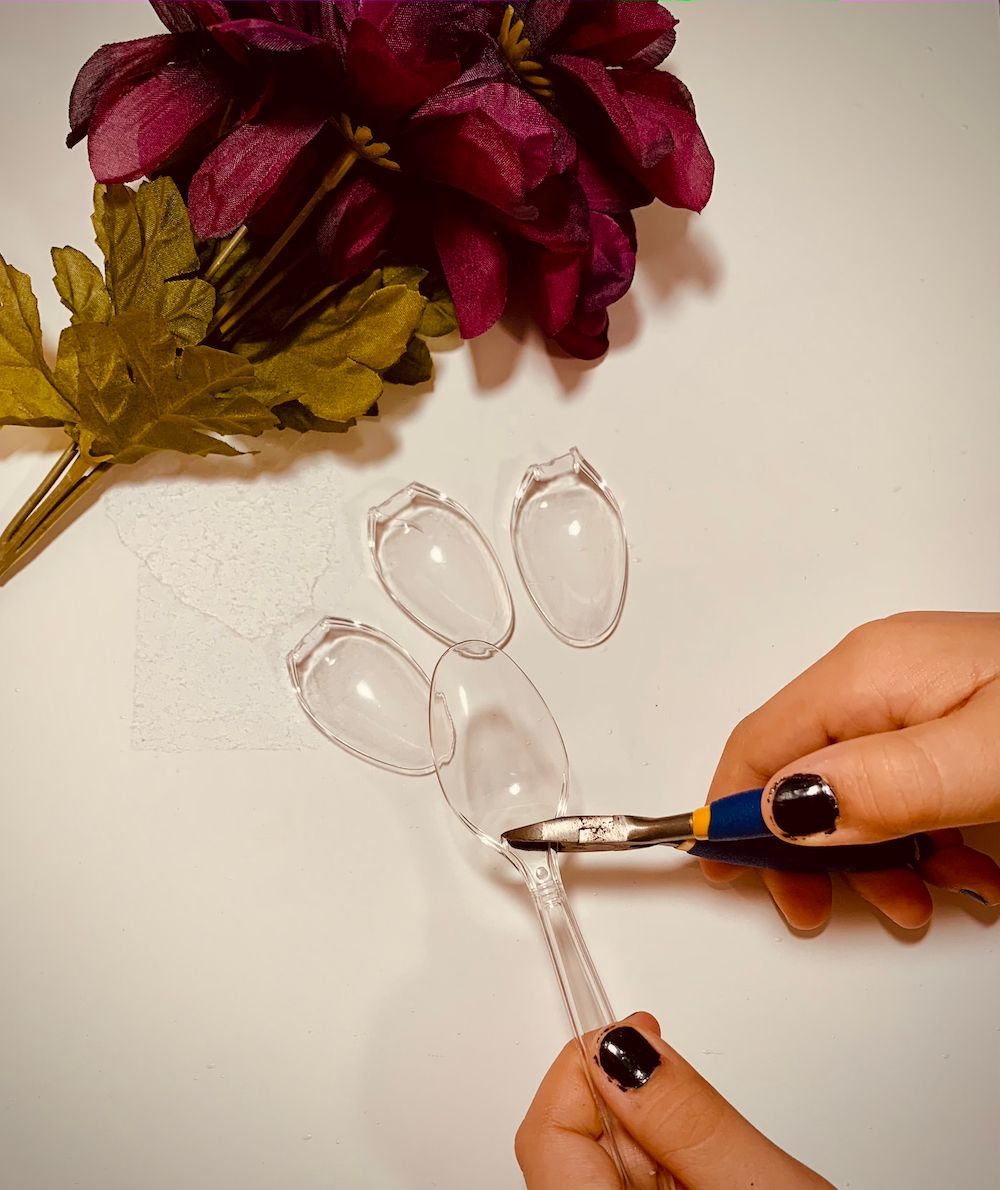
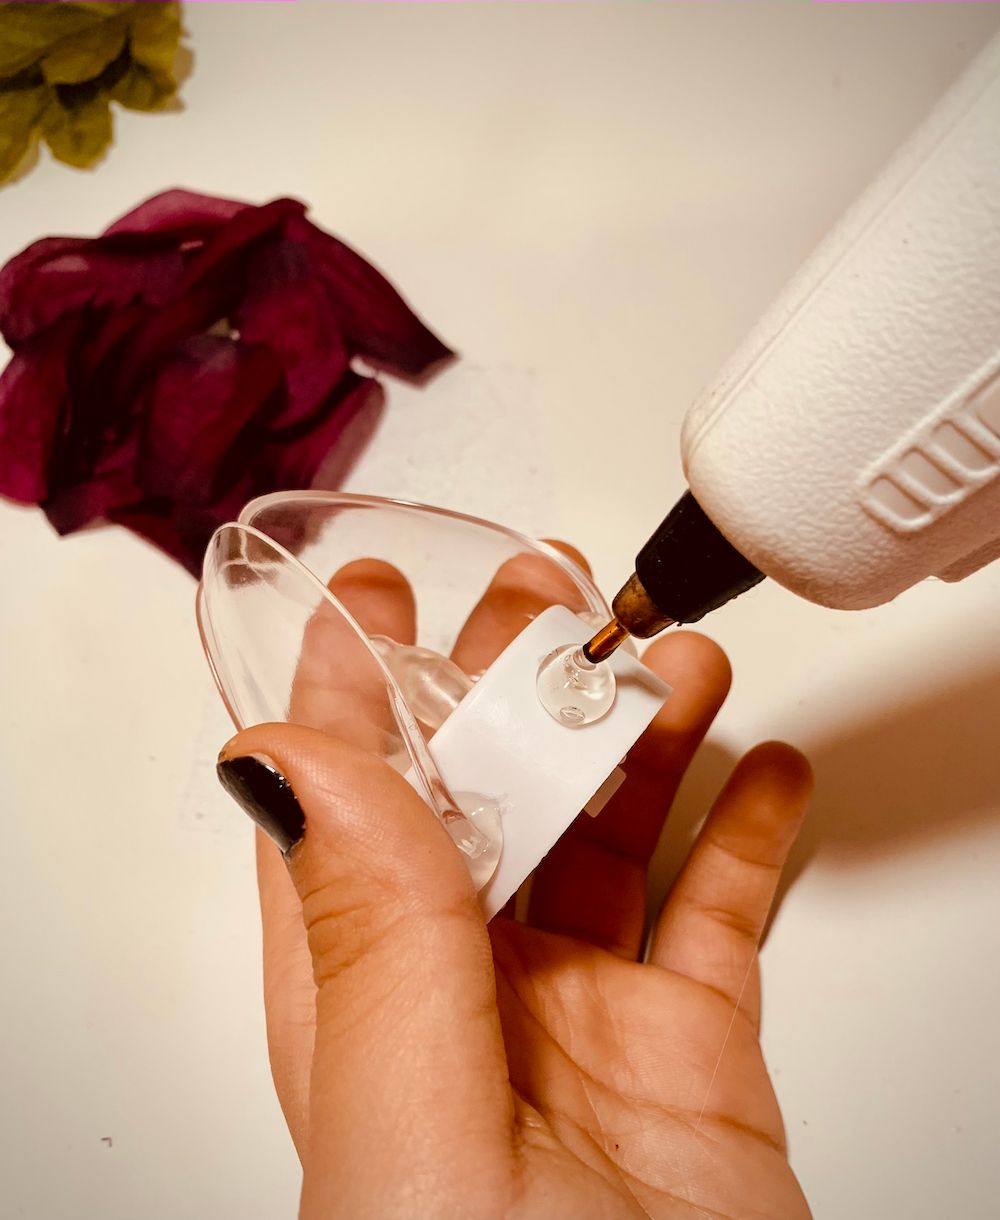
First, remove the heads of the spoons with the wirecutters and throw away the handles. Be careful of flying shards, as a splinter of plastic will occasionally fly off in the process.
Take apart the fake flowers. This should not be hard, as they are usually flimsy; I find 2 is usually enough to make a single candle, but it will vary depending on petal and votive size.
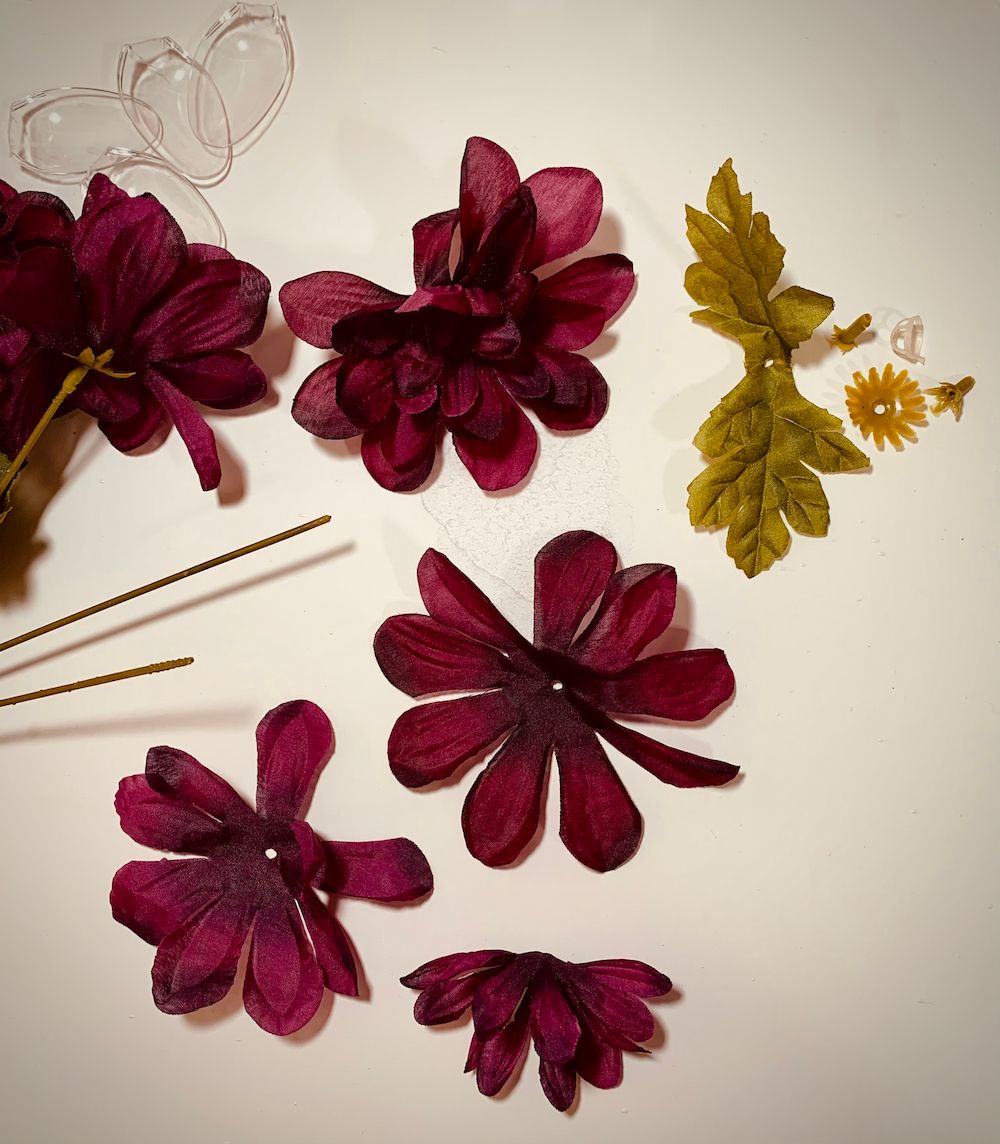
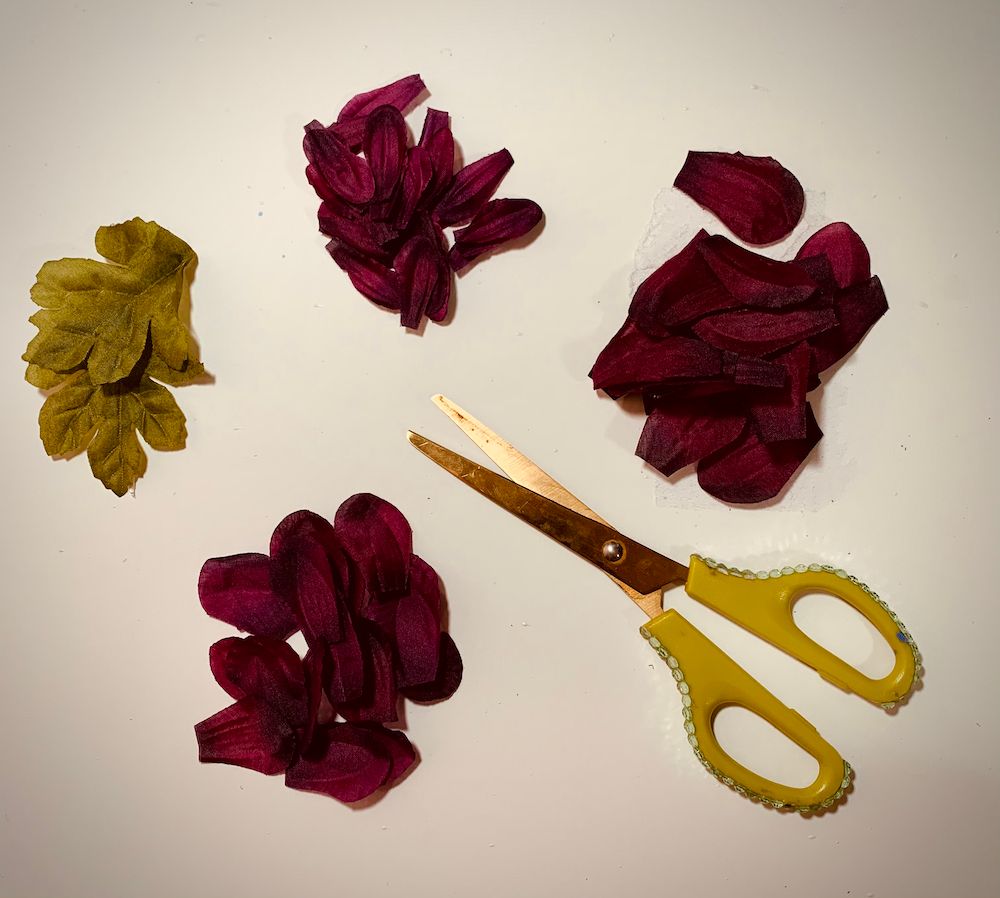
Sort the petal sections by size, then use the scissors to shear the indiviual petals from the central wheel. Keep them in groups separated by size, as this will save time later.
Glue 4 spoon heads to the outside of each votive candle, convex side out and forming a "tent" over the flame. This is your candle base.
I wanted a taller flower, so I glued them halfway up the side; the closer to the bottom you place them, however, the fewer petals overall you will need to cover the entirety.
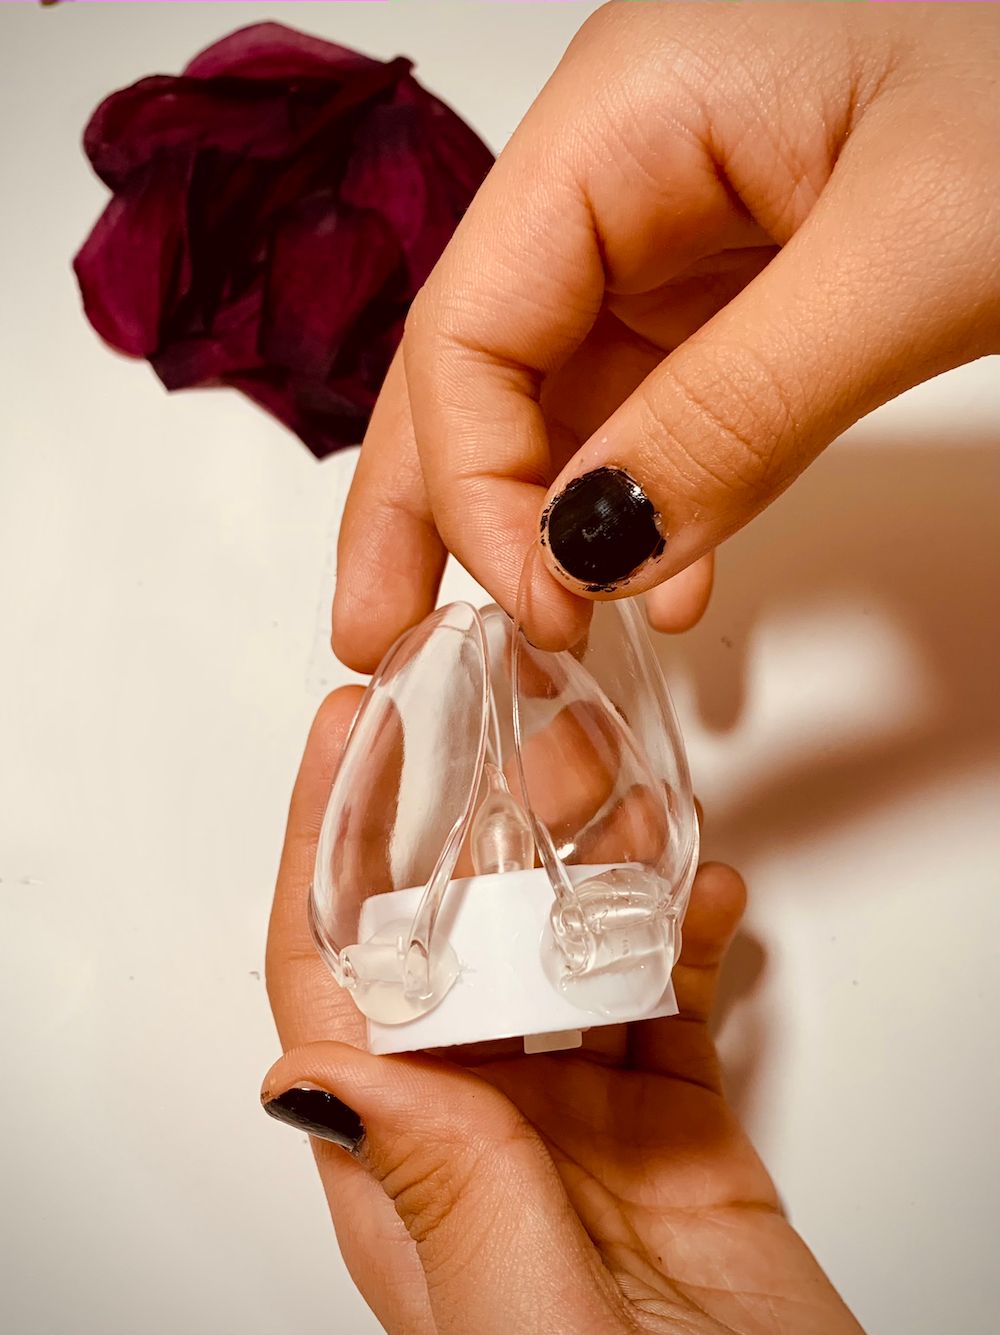
Starting near the tip of each spoon, glue on the smallest petals, convex side out and overlapping a little as you work your way around the spoons in a spiral.
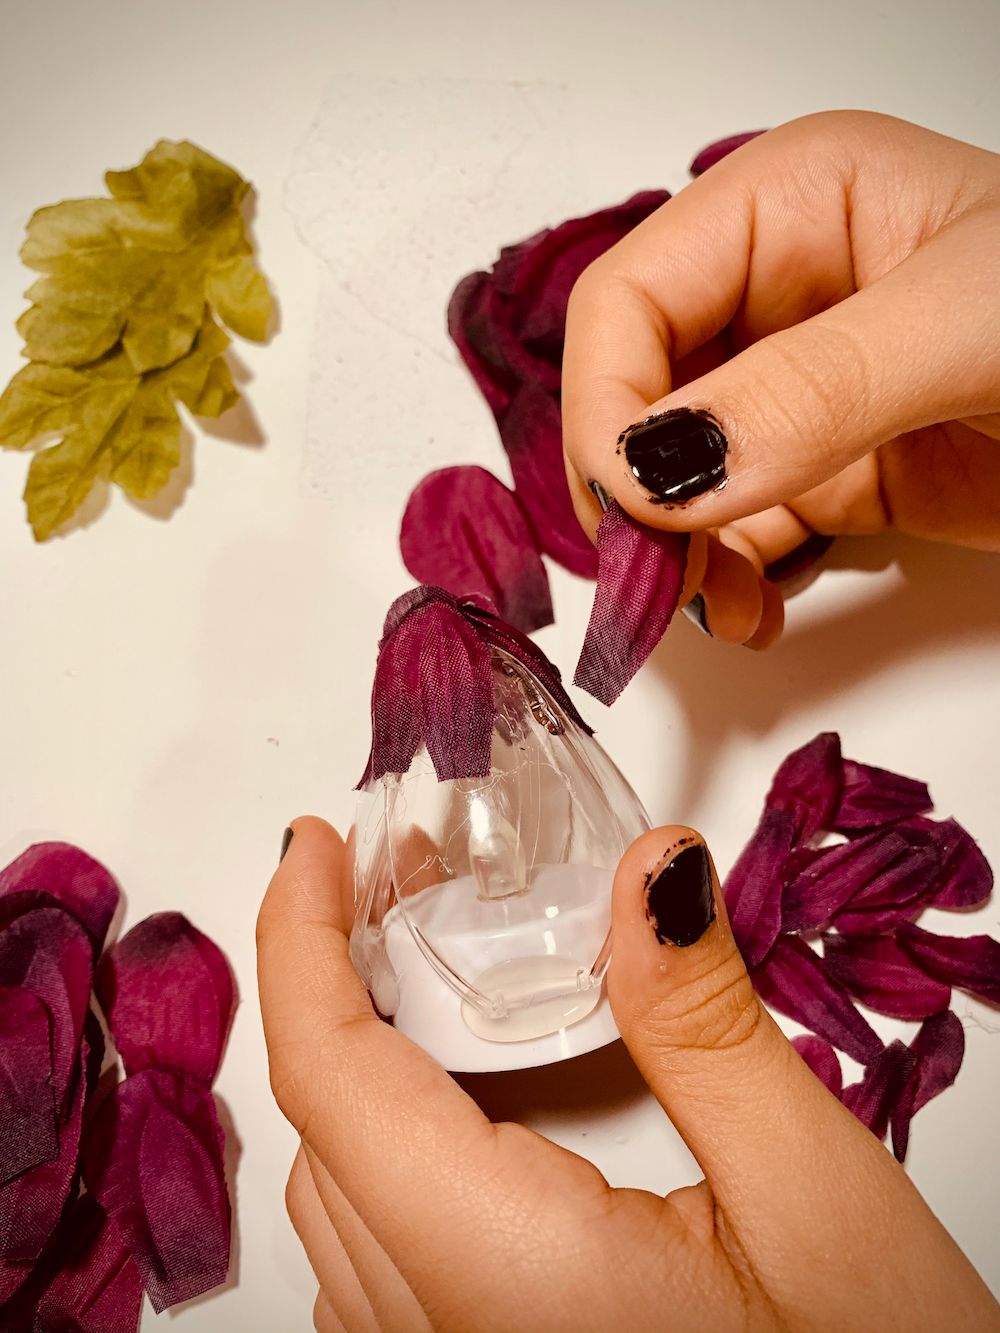
How much of the candle you should cover with each size of petal is easy to work out; different fake flowers have more or fewer sizes of petals: some have only 1 size, while others have up to 5. Be sure to know how many size groups of petals you have, and divide the height of your candle base by that number. For example, if you have three sizes of petal, you'll want each group to cover 1/3 of the candle. This ensures that your flower looks even and natural.

I like to cut a few leaves and glue them on at the end as well: in order to make them stick out horizontally from the base rather than upwards like a petal, pinch a very small amount of the fabric between your fingers as you press the leaf into the glue. This creates a fold that will keep the leaf flat. This technique can also be used to create rogue petals as you build your flower, to give it a windblown and realistically asymmetrical look. When the leaves are on, clean up any loose threads of hot glue that may be clinging to the petals.
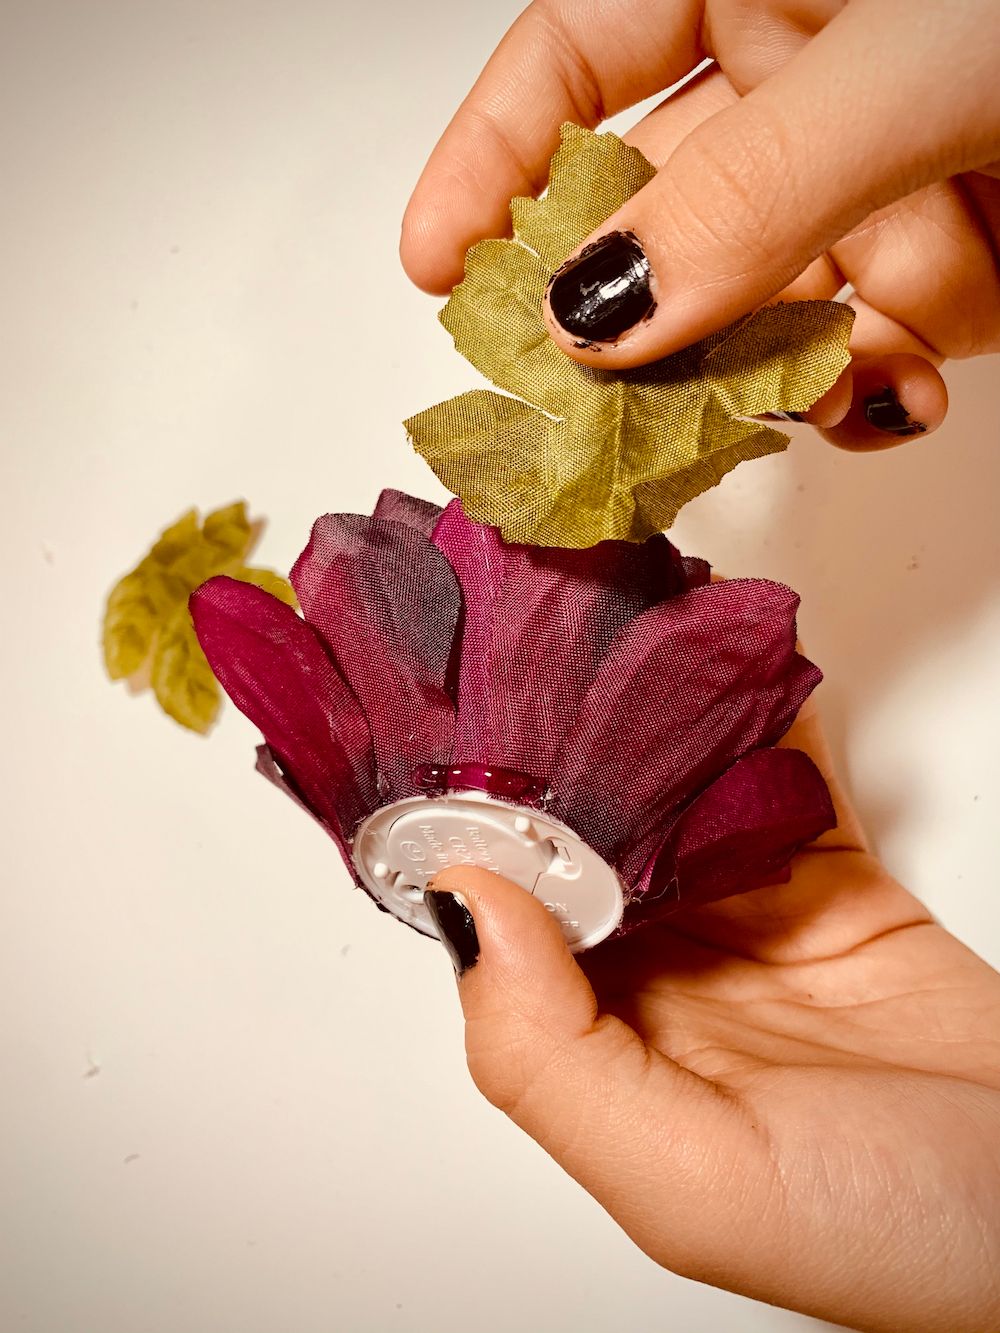
Finally, pull out the battery tab (if present) and turn on your glowing, flickering flower! The lighter your petal color and the brighter your votive, the more brilliantly your flower will shine!
I first made these votives as a present, working out the method through a bit of trial and error: the end result was so simple and relaxing to make that I now regularly stock up on artificial flowers at the dollar store, especially during seasonal sales for Christmas, Easter, or Halloween, when some truly unique colors and designs can be found. These glowing pieces of decor are just one of the many things you can create with artifical flowers (see below for a full price breakdown and more suggestions), but they're certainly a dear favorite of mine for their ease and versatility as a gift.
What is equally attractive about these votives is their accessibility and resale value: almost anyone can afford and get access to the base materials, while the finished product can easily be sold with a large profit margin. For example, if you sell sets of 3 for 12 dollars apiece, you are making about 10 dollars in profit for each set sold. This may sound ludicrous, but for the mount of time put in, and the fact that these are handcrafted, they are well-worth it! Even a casual bit of research showed me that very similar products sold for similar or higher rates: a single votive created in this style with oyster shells instead of petals was listed for $30! Others made of plastic were listed at around $9 dollars apiece, and a single LED votive with the top molded in the shape of a rose sold for $4.88! The main trade-off here would be time, but anyone accustomed to making these votives would be able to achieve a much faster rate of assembly than I have in my spare time, not to mention anyone with a few helping sets of hands! These would be an ideal project for a fundraiser, a craft fair booth, or gift baskets/care packages.
Price Breakdown
Below I have put a price breakdown with the real cost of everything as I could find it in my area: I have even included the cost of tools to show how afforable these candles are even if you start from complete scratch.
- 1.75 for 20 glue sticks = about 9 cents apiece
- 1.00 for 4 votives = 25 cents apiece
- 1.00 for 5 fake flowers = 20 cents apiece
- 1.00 for 48 spoons = about 2 cents apiece
- Hot glue gun = 2 dollars
- Wire Cutters = 1.80
- Scissors = 1.00
Each flower uses up 1 votive, 4 spoons, 2 glue sticks, and about 2 flowers: this brings the cost of each flower to about 91 cents apiece--- not too shabby at all! The cost of a single round of supplies is about 4.75 (9.55 if you don't already own scissors, a hot glue gun, and wire cutters). Depending on how many votives and flowers you pick up, you'll be able to make quite a few candles before you run out of glue sticks or spoons, and once you realize how fun and relaxing crafting these can be, I can bet you'll be making more than a few!

This simple method of gluing deconstructed petals to a base can be happily applied to a number of other projects and ideas, including:
- Costumes and cosplay (shoulder pads, skirts, lightweight earrings, etc)
- String lights (smaller petals can be glued directly to miniature bulbs)
- Doll hair/hats (directly on the scalp if smooth, or onto a cap)
Have fun, and happy crafting!

Comments powered by Talkyard.